Using Airtable with Clockwork Micro for an Easy No-Code Map
In this step by step guide, we'll walk you through the process of integrating Airtable with the Clockwork Micro Mapmaker to create dynamic maps with no coding.
Step 1: Organize Your Data in Airtable
a. Create a new base in Airtable or select an existing one.
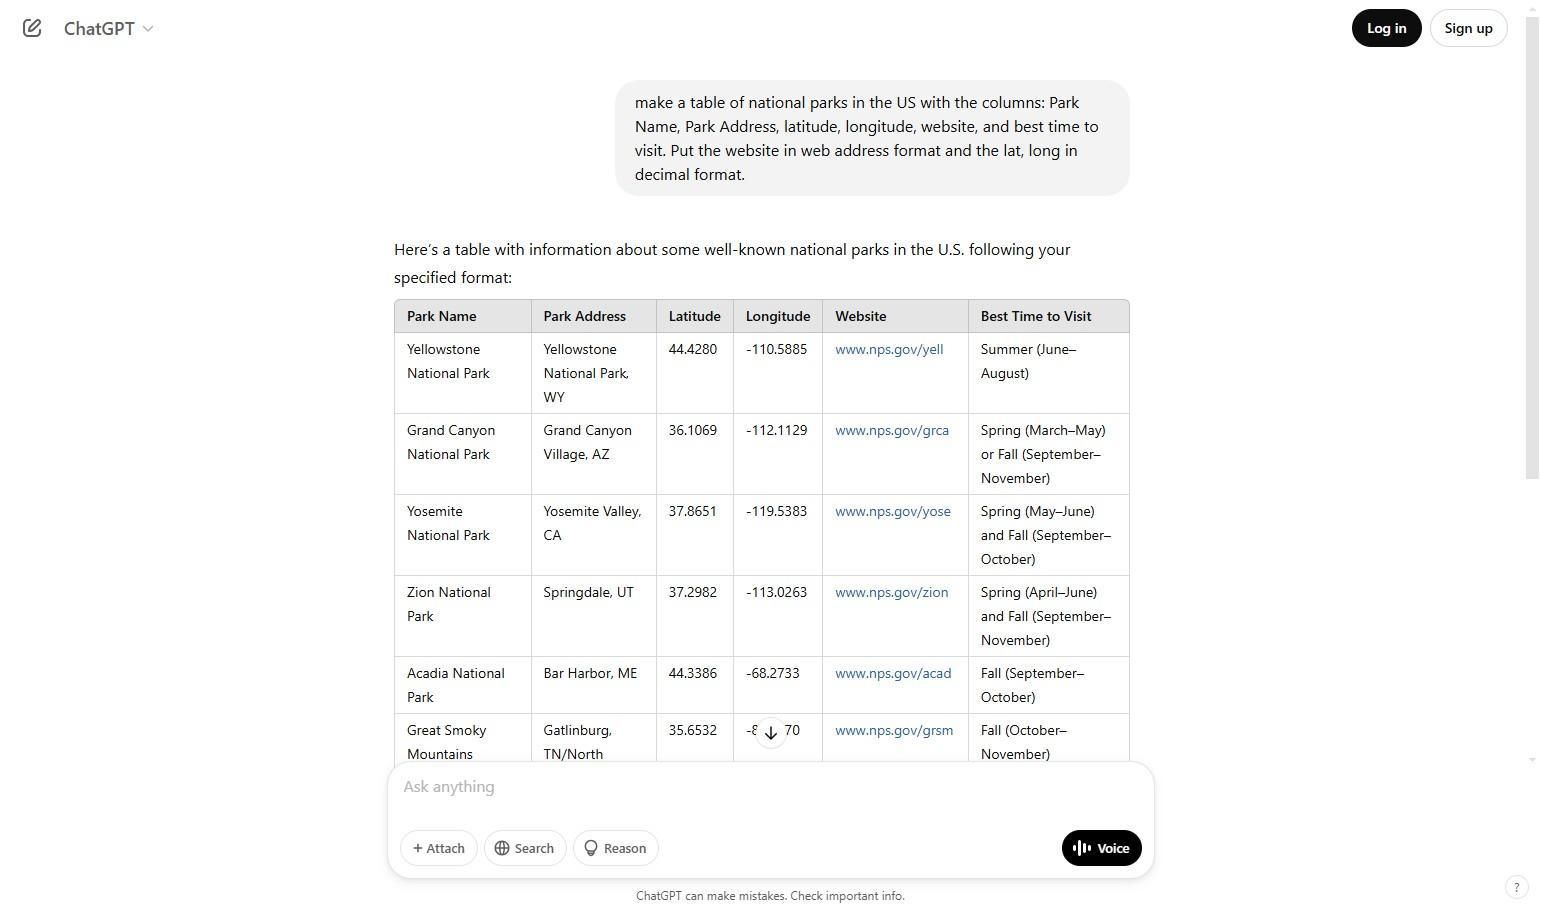
TIP: Consider using AI to help create your dataset. Make sure to ask the AI for the lat and long in decimal format.
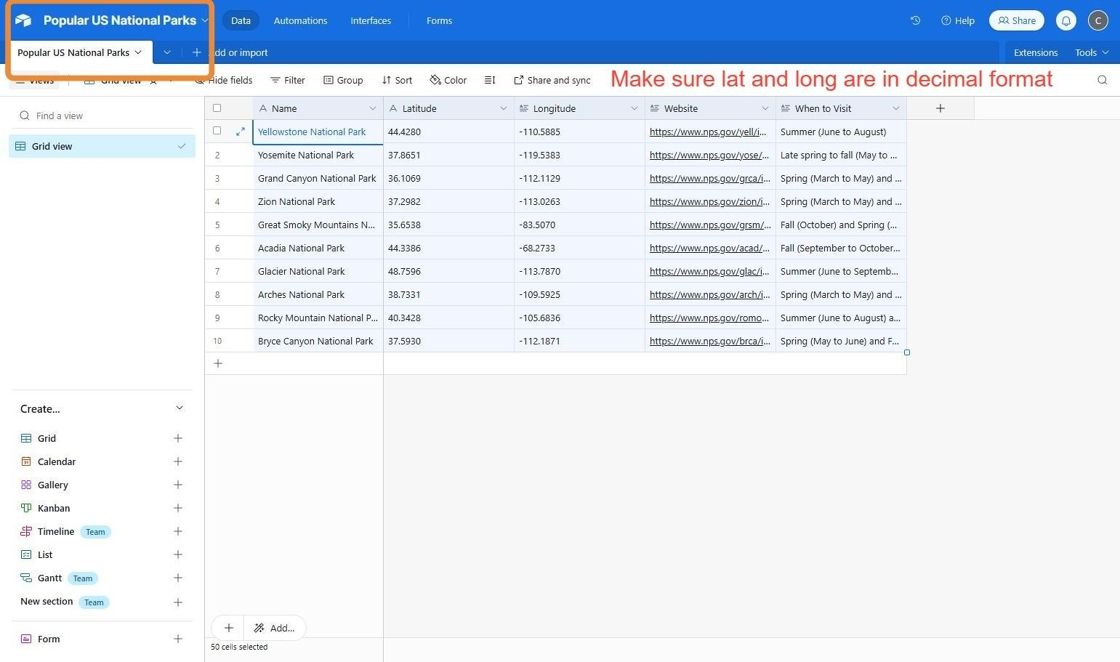
b. Give your Airtable base a name, such as "Popular US National Parks."
c. Within your base, create a table with the same name for easy reference.
d. Add fields for all your data. Make sure to include Latitude and Longitude in decimal format so the mapmaker tool will display it properly.
TIP: If you had AI generate a table of your data, you can simply copy and paste it into your base.
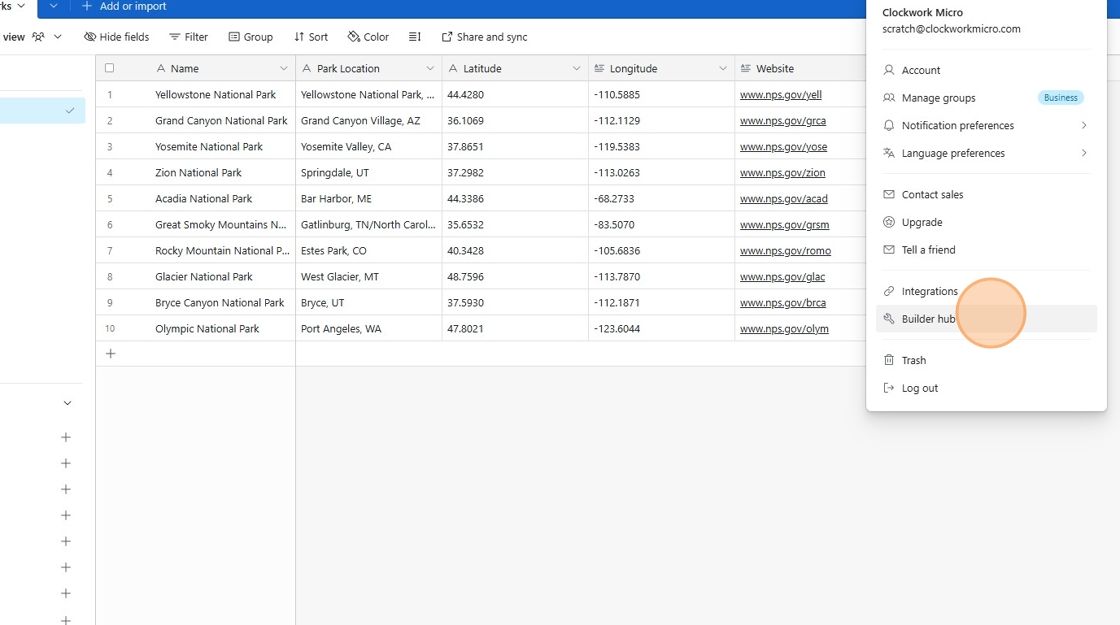
Step 2: Obtain an Airtable Personal Access Token
a. Navigate to the 'Developer's Hub' in Airtable and create a new token by clicking on "+Create New Token."
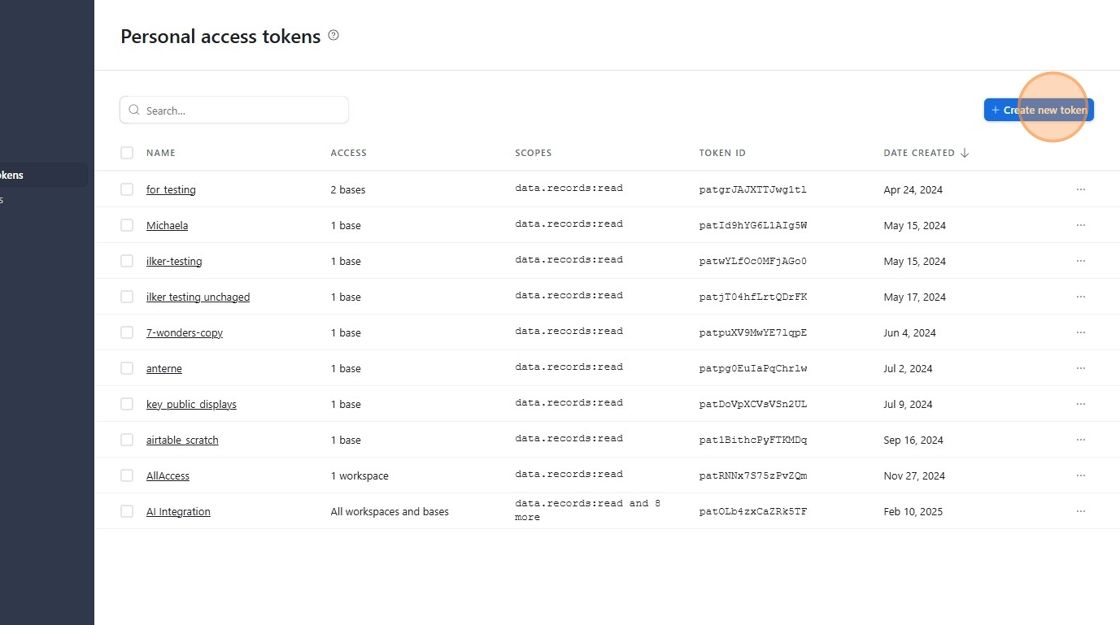
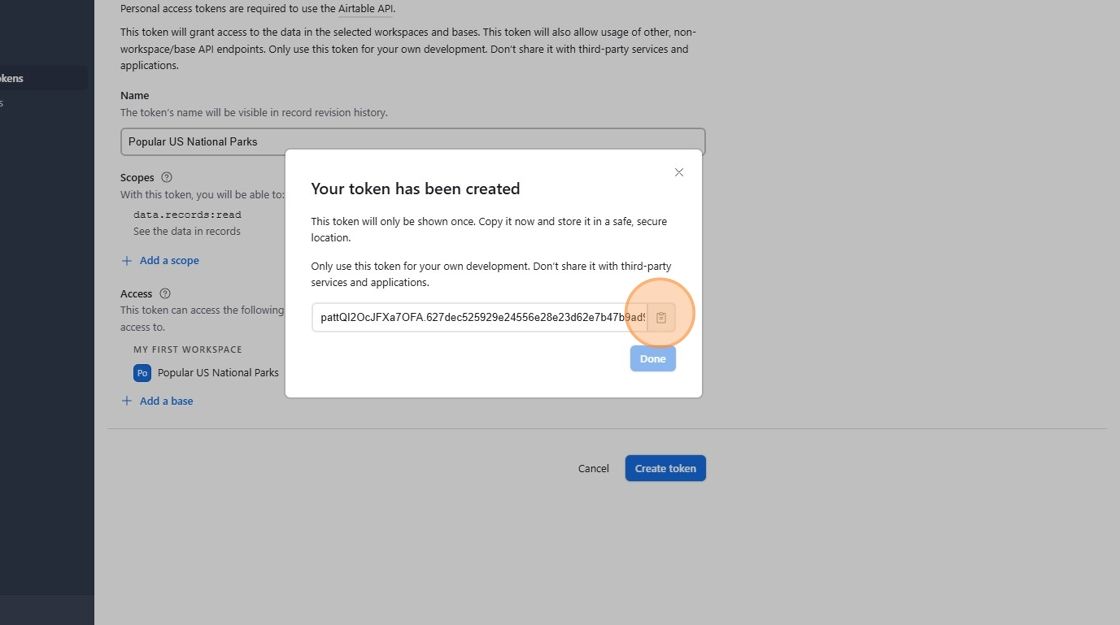
b. Give the token a descriptive name, such as "US National Parks"
c. Ensure that you select the scope data.records:read. This allows the Clockwork Micro mapmaker to access your data.
d. Under access, choose the base you're working on, then click on "Create Token."
TIP: Remember, this token is shared only once, so be sure to copy and save it in a secure location.
Step 3: Connecting Airtable with Mapmaker
a. Log in to your Clockwork Micro account.
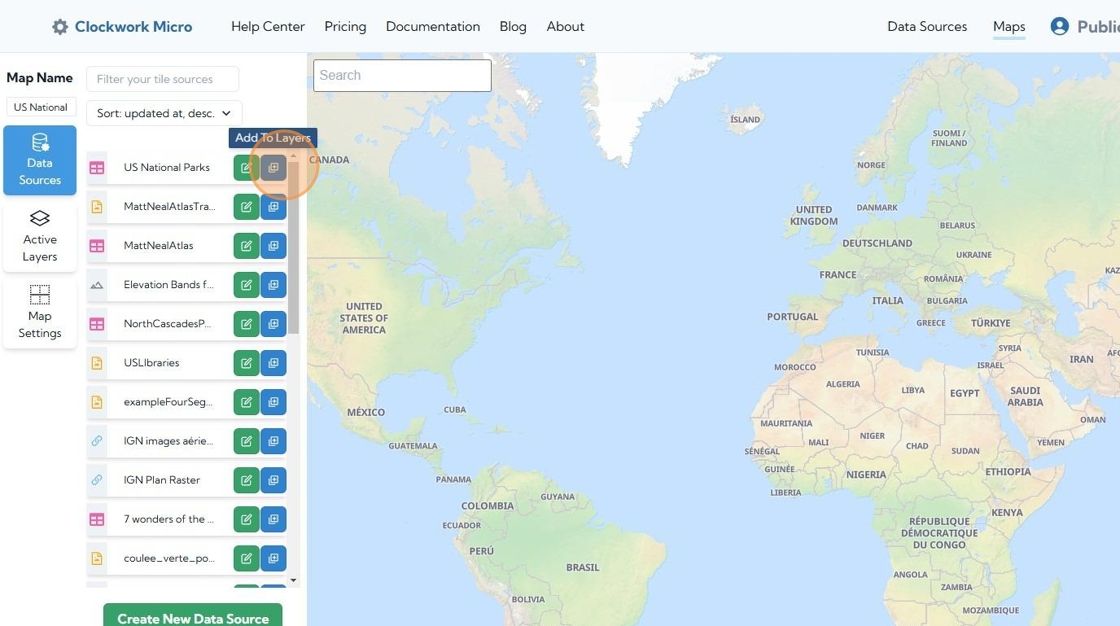
b. Click "Data Sources" on the home page and then “Add Data Source”
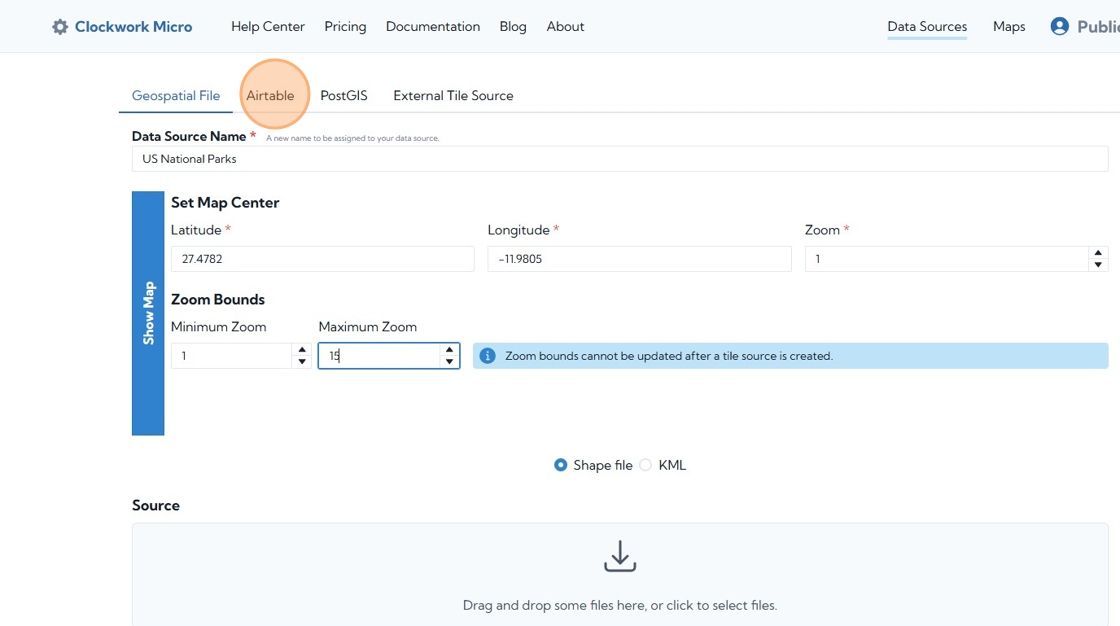
d. Choose the Airtable option from the available data upload choices.
e. Name your Data Source for easy identification
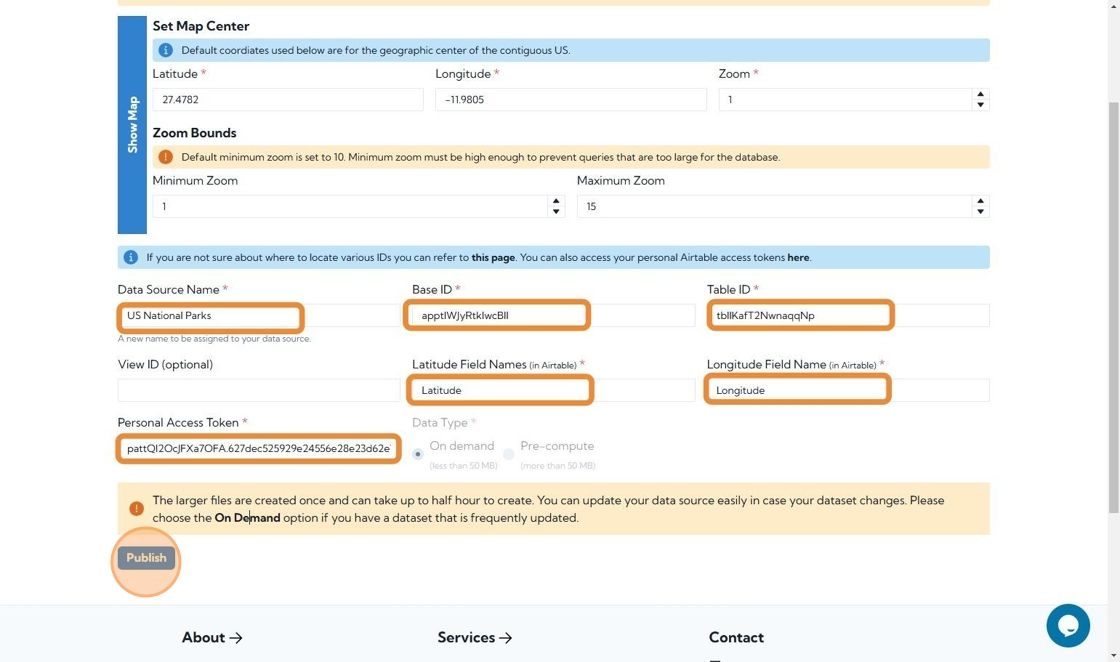
f. Adjust your map's zoom bounds. For this example, we set the minimum zoom level to 1 and the maximum to 15.
g. For help finding the Base ID and Table ID, refer to this link. For quick reference, in the web address for your Airtable base,
- Base IDs begin with "app"
- Table IDs begin with "tbl"
- View IDs begin with "viw"
h. Add the Personal Access Token you generated in the Developer’s hub.
i. Verify that latitude and longitude field names match between Airtable and Mapmaker. Note that these names are case sensitive.
j. Click "Publish." Depending on data size, it may take several minutes for your data source to be created.
Step 4: Upload Airtable data on a New Map
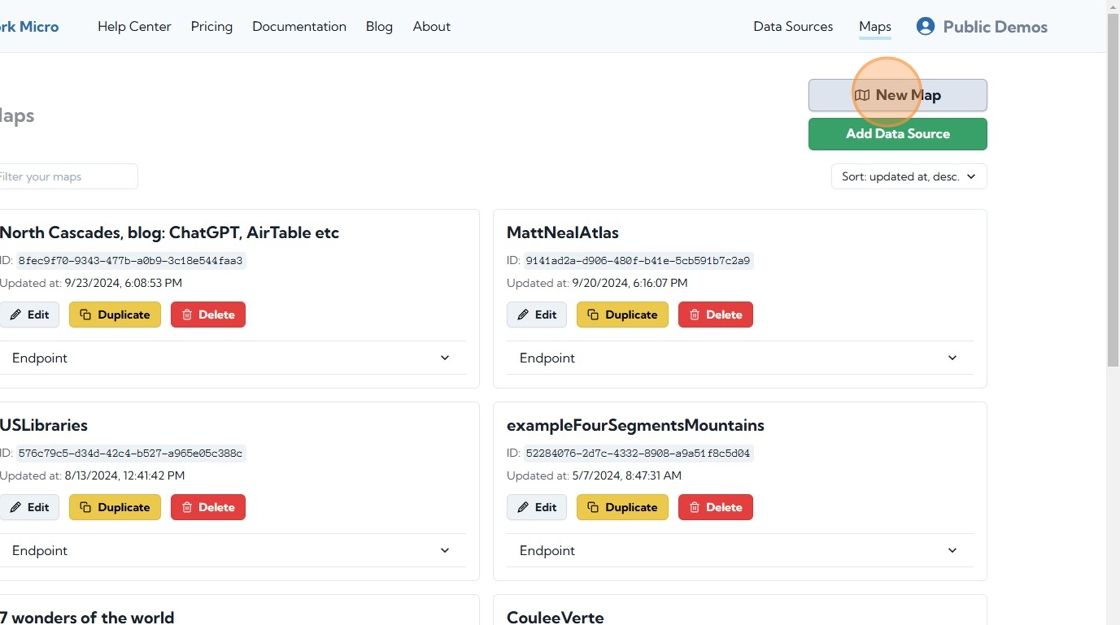
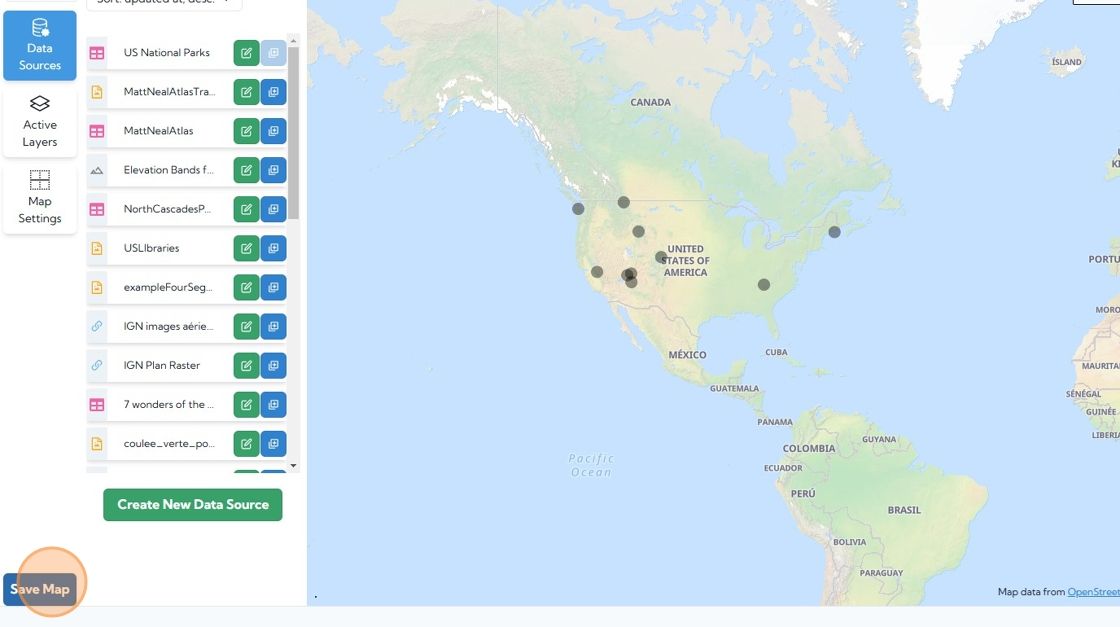
a. Click the "New Map" option located in the upper right corner of your screen.
b. Once the new map loads, find your data source in the "Data Sources" section. If it’s not displayed, it might not be finished processing. Try again in a few minutes.
c. Click the blue icon beside your data source to add it as a layer on the map. Make sure to Save your map at this point.
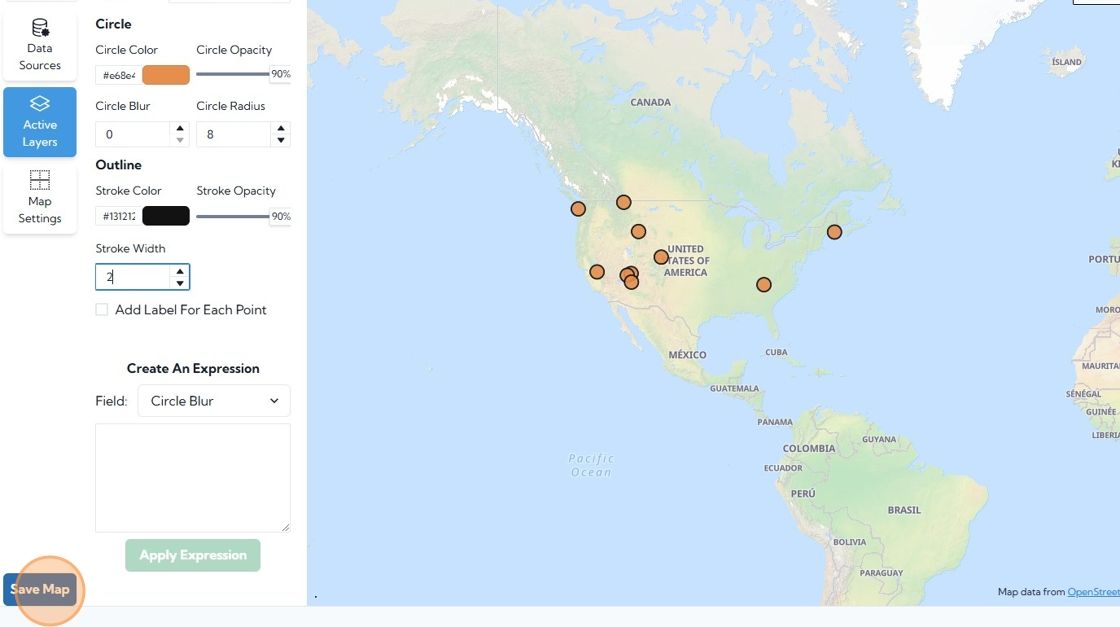
d. Click the "Active Layers" icon to view the options for your data points.
You can adjust the color, size, opacity, and outline of the circles. Remember to Save your map after making any changes.
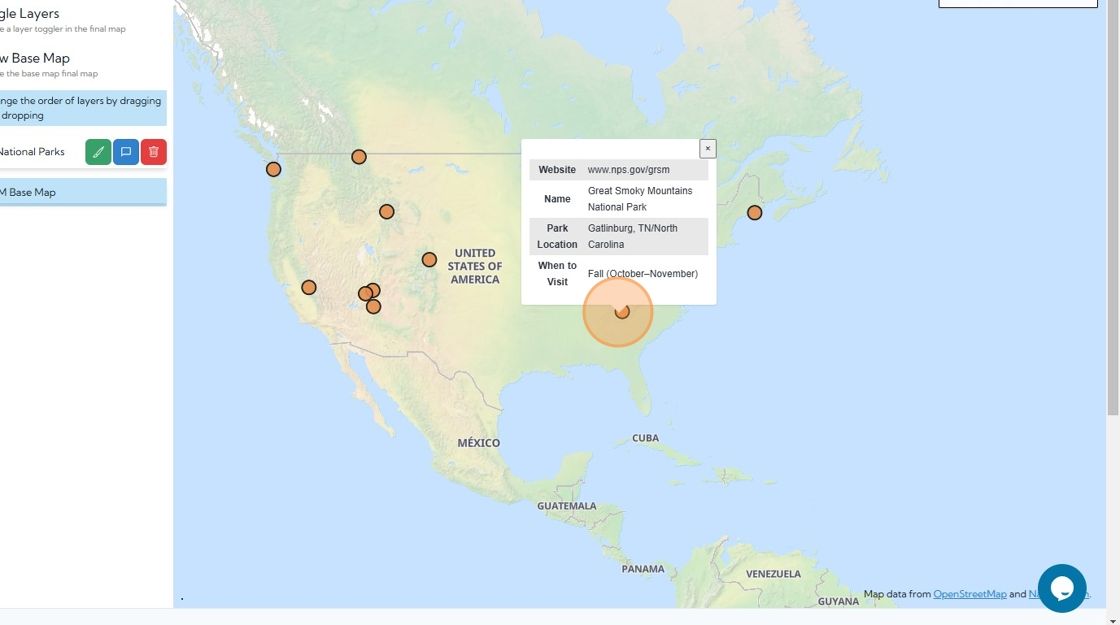
Step 5: View your map with default popups
Clockwork Micro has a built in popup that will appear when you hover over a data point on your map and display the other fields in your Airtable.
Step 6: Link to your map
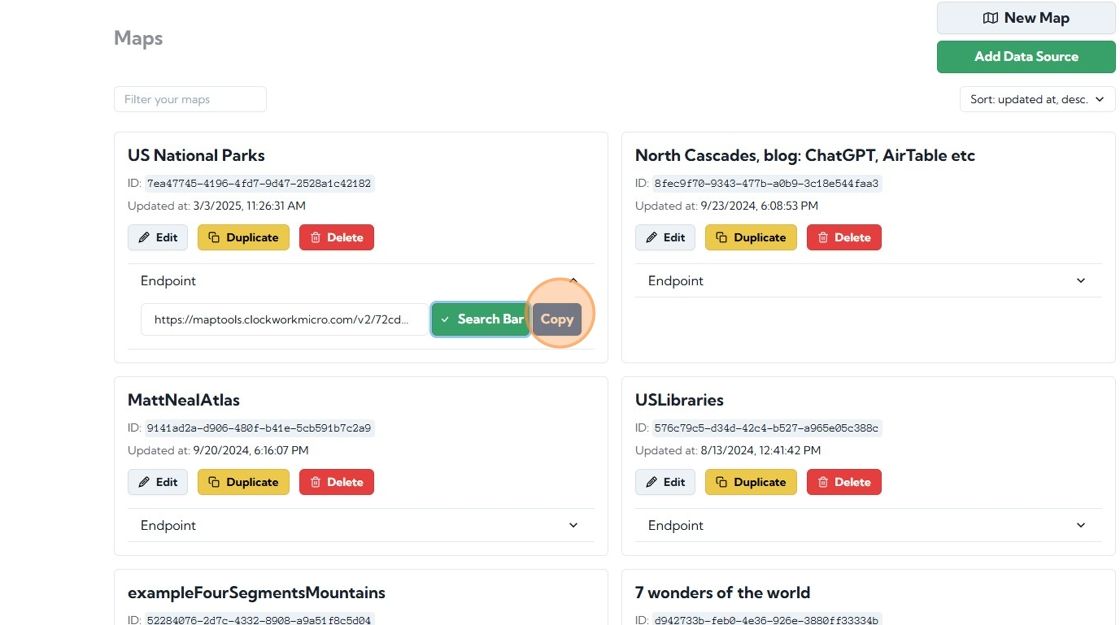
- From the Maps page, find your map and click to view the endpoint address. Click the blue Copy button and paste it into your web browser. If you'd like, you can also add this link to an existing webpage.
And that’s all it takes to create your own interactive map from an Airtable dataset!